AP/APCR/HEAT highlighting
AP, APCR, and HEAT shells will see armour like the images below:
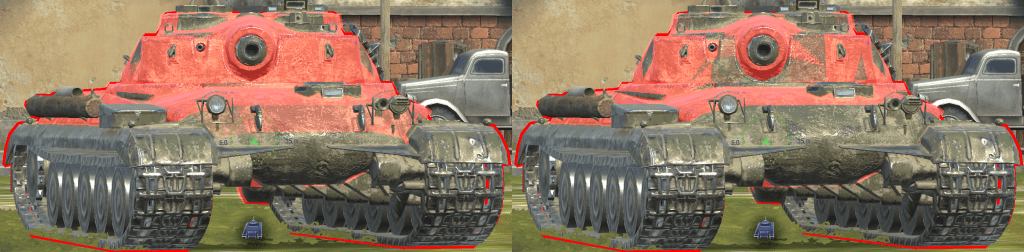
Notice the different levels of red highlighting in the 2 images above.
-Areas which are “full red”, your shell has no chance of penetrating.
-Areas which are partially red (such as the upper plate in the left image, or the turret front in the right image), your shell has a chance to penetrate, but it also has a chance to bounce. (The more red and less transparent it is, the less likely it is to pen, and vice-versa.)
-Areas which are “grey” are a guaranteed penetration (such as the lower plate or cupolas (hatches on the roof).
When using AP, APCR, or HEAT, avoid shooting red areas.
HE highlighting
HE type shells will see armour highlighting like this:
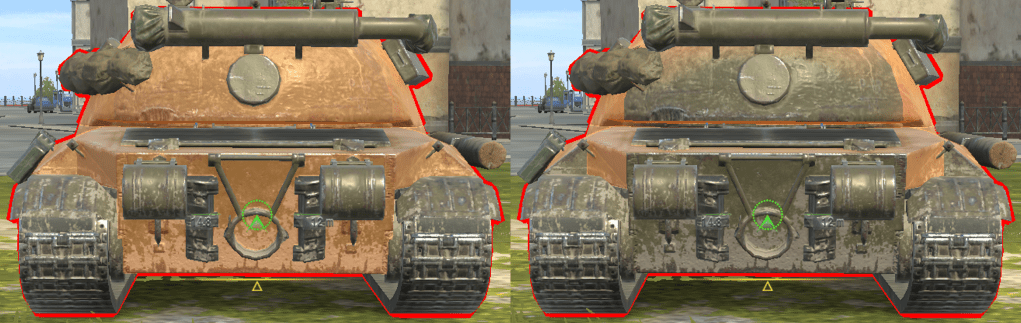
-Areas that are highlighted in red (not shown in image) are areas which your HE shell is unlikely to cause splash damage*.
-Areas highlighted with yellow are where your HE shell can’t penetrate, but can cause splash damage*.
-Areas with “grey” highlight are where your HE can penetrate and deal full damage. Make sure that the “grey” area isn’t spaced armour, since spaced armour stops HE.
*Splash damage is when the HE shell doesn’t penetrate but explodes on the outside of the armour, causing a smaller amount of damage.
Spaced armour
Some spaced armour highlights correctly, showing red on areas which you can’t penetrate, and grey on areas which you can penetrate. Other spaced armour highlights incorrectly staying grey even if you can’t penetrate it, or showing red when it is actually penetrable.
Due to there being so many tanks with spaced armour in the game, knowing what is a “real” red or grey area is basically just trial-and-error.
