
Charlemagne is a British tier 8 heavy tank. It is a great all-rounder heavy with good stats in all areas, however with armour is focussed on the turret, not the hull. It mounts a 120mm gun with has access to HESH and high damage HE rounds.
Click the table of contents below to access the section you want:
- Armour
- Gun
- Mobility
- Equipment, provisions, & consumables
- Gameplay advice
- Tank gameplay:
- Overall
- Is it worth getting?
- Camo cost:
- Historical note:
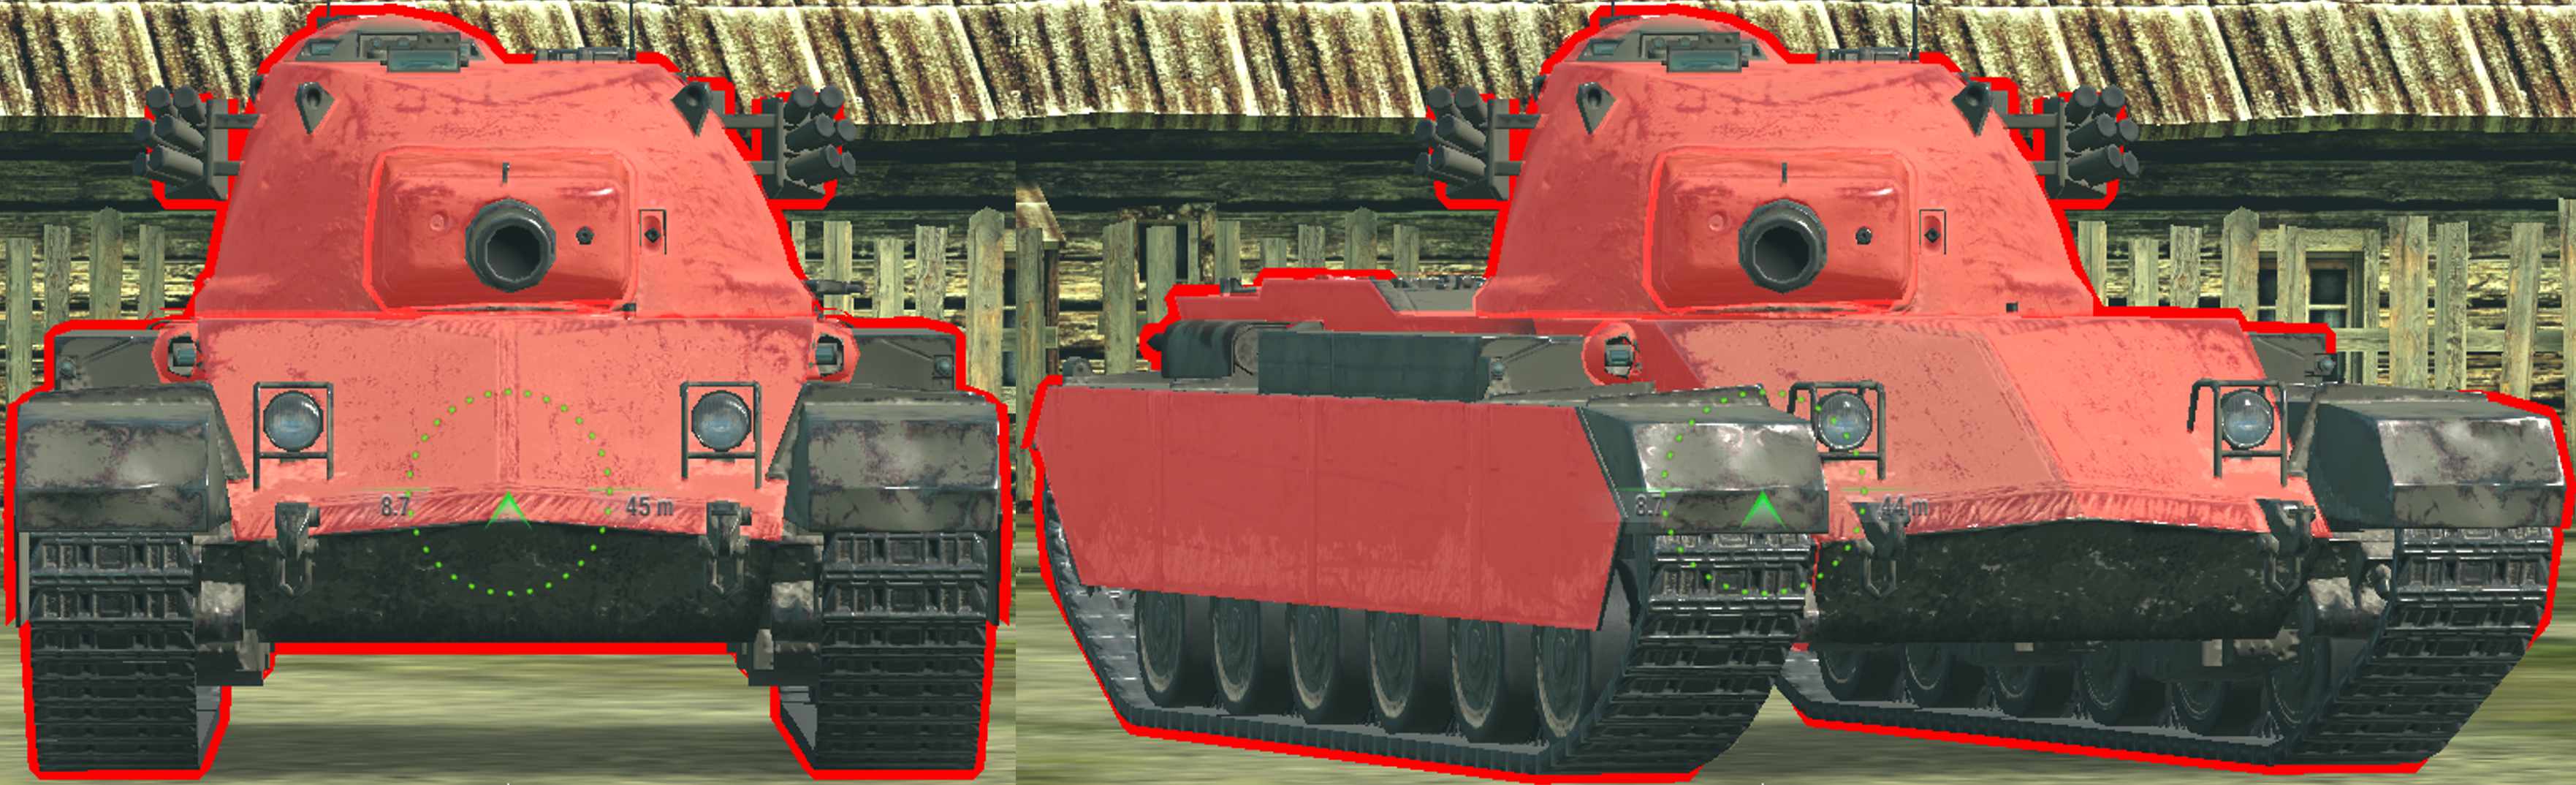
Armour
(The Charlemagne in the images is using Improved Assembly)


Drag slider right -> to view 225mm AP
Drag slider <- left to view 265m APCR
When flat and facing head-on:
Upper plate 205-220mm
Lower plate 120mm
Turret 260-600mm+ (weakest point 230mm right next to gun)
Cupola 100mm

vs 225mm AP (top image), 265mm APCR (bottom image)
Using -8 gun depression:
Upper plate 285-300mm
Turret 280-600mm+ (weakest point 240mm right next to mantlet)
Cupola is essentially hidden
The upper plate is fairly weak for a tier 8 heavy tank. Due to armour normalization of AP shells, the effectiveness of this tank’s upper plates is between 190-195mm.
Tanks with around this level of penetration will have roughly a 50% chance to bounce off the upper plates. Tanks with more penetration than this will be able to penetrate the upper plates reliably on flat ground.
Side armour:
Charlemagne’s sides are 70mm, quite decent. They are also angled inwards, similar to a Centurion tank. This increases the thickness of the sides when the tank is angled, making it quite a good sidescraper.
The tracks are 25mm thick, slightly better than most other heavy tanks with 20mm tracks. The tank also has a 10mm spaced sideskirt which covers most of the hull side.
Armour performance vs tier 7 tanks:
Against tier 7 enemies, the Charlemagne generally has a very solid armour profile. You can easily bounce all MT, LT, and most HT standard ammo, and even premium ammo from lower penetration level MT and LTs.
As its upper plates are effective up to about 190-195mm, the only tanks that can penetrate the upper plates without using premium ammo are German heavies, USA heavies, and most TDs.
The turret is very strong, and other than very narrow weakpoints right next to the gun mantlet, the majority of the turret face is impenetrable.
The cupola and lower plate are weak to all enemies.
Armour performance vs tier 8 tanks:
As stated above, the upper plates will only bounce up to around 190-195mm penetration, in tier 8 this means that most tanks will easily penetrate the hull. The only tanks that have a good chance of bouncing are the low penetration MT and LTs.
The turret is strong in most areas, the only areas which enemies may penetrate are right next to the gun mantlet. Shots do occasionally penetrate here but they don’t happen often due to how small they are and how small the turret is.
Again the cupola and lower plate are weak to all enemies.
Armour performance vs tier 9 tanks:
No tier 9 enemy will struggle to penetrate the Charlemagne’s upper plate, lower plate, or cupola.
The only strong areas of this tank are its turret face, which will be able to bounce even most tier 9 premium ammo on the majority of the turret. It still has the weakpoints on turret cheeks, and some tier 9 heavy tanks have 340mm HEAT penetration, so don’t rely on the turret fully, especially if you know your enemy has high penetration.
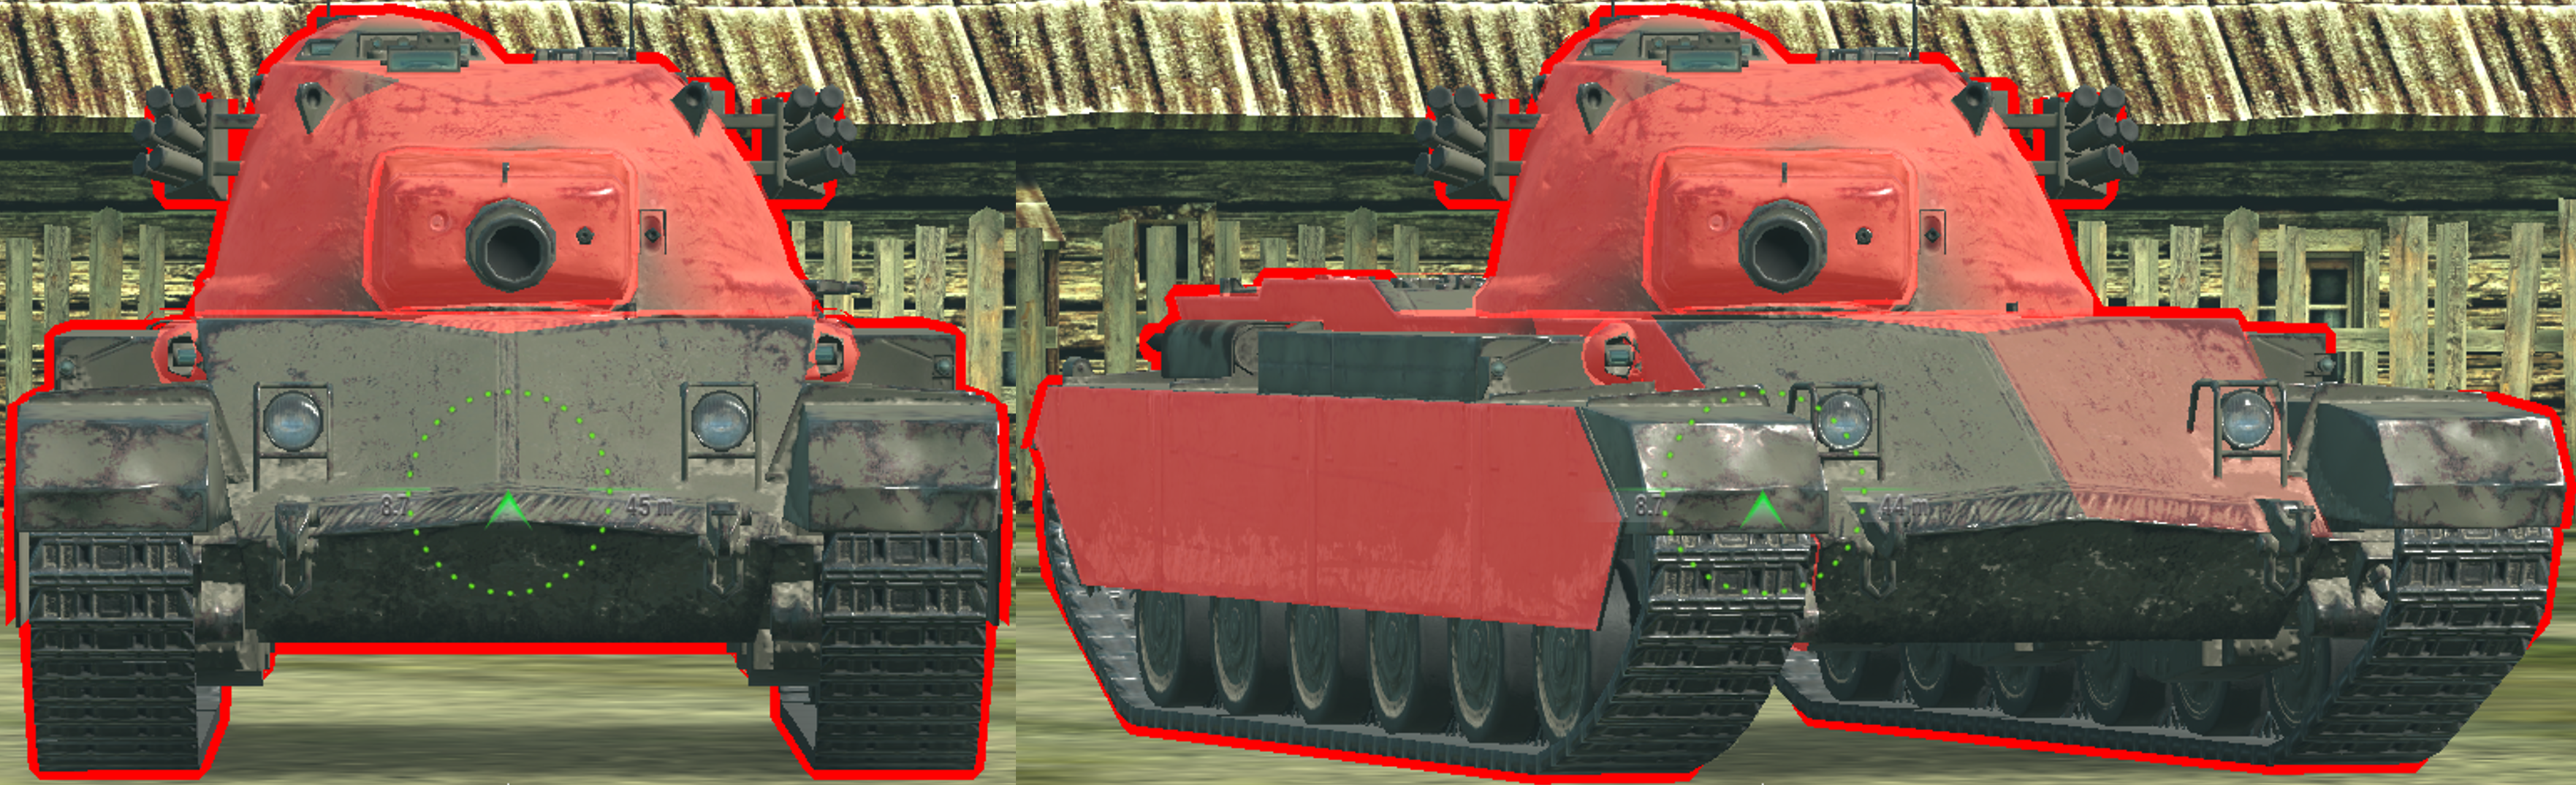
Drag slider right -> to view 185mm AP
Drag slider <- left to view 240m APCR
This is representative of a low penetration tier 8 MT/LT, or a tier 7 heavy tank.
Gun
The Charlemagne mounts a 120mm “Low Velocity” gun
Charlemagne uses all 3 of its ammo types often in battle:
The gun’s reload time is 11.5s.
AP: 390 damage per shot, 2028 DPM, 227mm penetration.
HESH: 470 damage per shot, giving it 2445 DPM, 158mm penetration
HE: 530 damage per shot, 2757 DPM, 68mm penetration
–Estimated aim time is 4.0/4.3s
–Base aim time is 2.6s, but it can get down to 2.12s.
-Dispersion is 0.326/0.293
–Gun handling is 0.17/0.13/0.16, or 0.15/0.11/0.14 with Vertical Stabilizer.
-Gun depression is -8 degrees
If you decide to use Calibrated Shells:
-Reload time will be 12.4s
-1887 DPM on AP, 2273 DPM on HESH, & 2564 DPM on HE
-Penetration on AP is 238mm, HESH is 174mm, and HE is 75mm.
Note that this gun is not actually “Low Velocity”, this naming is due to the tank’s historical aspects, described in the below section. The velocities of this gun are 850m/s on AP, and 750m/s on HESH and HE, both of which are pretty good velocities.
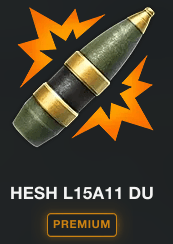
Charlemagne’s HESH shell:
This is a premium shell, so costs extra credits.
It deals 470 damage, and has 158mm penetration.
Overall this is a great gun. It has high standard penetration with decent HESH and great HE penetration numbers. All 3 shell types have uses, accuracy is great, gun handling is good, and aim time is good.
The DPM is quite low (on AP), especially if using calibrated shells, however its not to a point that its unusable. The DPM on HESH is very good considering the 470 alpha, but penetration is low.
Mobility
-Top speed is 35km/h forwards, and -13km/h in reverse
-Traverse speed is 38.7 deg/s on hard terrain, and 27.7 deg/s on medium terrain.
-In game acceleration rate is shown as 15.4 hp/t, it has strong 702hp engine for its 46 ton weight.
-Actual acceleration rate is 15.4 hp/t on hard terrain, and 11 hp/t on medium terrain.
–Terrain resistances are 1/1.4/1.6
This is fairly decent mobility. The top seed is average, reverse speed is just below average. Acceleration on both terrain types is good, and traverse speed on hard terrain is good, but fairly unimpressive on medium terrain.
For its armour, the mobility isn’t impressive, but its also not bad.
Equipment, provisions, & consumables
The Charlemagne has no special consumables.
Calibrated Shells:
The Charlemagne is a tank all about its gun, its armour isn’t special and its mobility is just average, its gun is what’s special. One of the main aspects of its gun is the HESH ammo, and also the HE.
To maximize your effectiveness when using HESH and HE, you should use calibrated shells. There are multiple good reasons:
-You don’t have high-penetration premium ammo. AP is your highest penetration ammo, so increasing the penetration of this shell will help against so many heavily armoured enemies (Tiger II is a great example).
-HESH has fairly low penetration if not using calibrated shells. 158mm base penetration is not at all impressive and will struggle to penetrate the fronts of many tier 8 tanks and most tier 9 tanks (even on lower plates).
-HE has good penetration and damage, increasing its penetration with calibrated shells lets you use it more often.
Calibrated shells would increase AP penetration from 227mm to 238mm, HESH penetration from 158mm to 174mm, and HE penetration from 68mm to 75mm. The increased AP penetration lets you deal with tier 8-9 heavies much easier, increased HESH lets you penetrate much more lower plates and upper plates, and the HE (which does 60 more alpha than the HESH) can be used against more sides and rears of tanks.
Improved Assembly:
Due to the Charlemagne having a fairly weak hull and a strong turret, its better to use improved assembly over enhanced armour. Its best to expect to be penetrated on the hull rather than trying to improve the armour, as the hull is weak to the most common enemies you face, which are tier 8 heavies.
Improved assembly will improve the Charlemagne’s HP from 1800 up to 1908, which will let it take more hits when it gets penetrated, and its good for trading damage (especially with the high alpha on its HESH and HE shells).
Vertical Stabilizer:
Due to the great accuracy of the Charlemagne (0.326), you don’t need to use refined gun for any reason. The tank has great accuracy among all tier 8 heavies, let alone for its high alpha.
Use vertical stabilizer, its much better for the frontline playstyle of the Charlemagne, where the tank needs to be quite active and constantly turning the hull, turret, or repositioning and pushing. Vertical stabilizer improves the tank’s accuracy when its moving, making the tank more consistent with its shots in an active playstyle.
Gameplay advice
Charlemagne is a hulldown-only tank. Its armour will only work when its hulldown or using gun depression, in other situations you have to treat the tank like it has no armour.
General gameplay:
Take the Charlemagne to the heavy tank side of the map. The tank has a fairly mediocre traverse speed, and overall fairly average speed. If faced against the faster MT and LT, it will have trouble keeping up with its allies, and also often struggle when getting circled, as both hull and turret traverse aren’t impressive.
Another factor to consider is the HESH use. HESH is a shell that relies heavily on hitting larger armour plates, or sitting still to aim properly at smaller targets, as this shell cannot afford to hit modules, spaced armour, or thick armour. Mediums and lights are quick and agile tanks, so even though they have less armour, in many cases it will be impractical to use HESH due to the enemy’s movements. MT and LT are also just smaller tanks in general, making HESH harder to use against them at longer ranges.
Against heavy tank enemies, the Charlemagne’s mobility and speed are good enough to not get left behind, and the tank can contest some frontline positions or cap circles. Heavy tanks have more armour than mediums, but also move slower and are generally larger. This makes using HESH fairly easy with the right scenarios, as heavy tank movements are more predictable and manageable for HESH shell use.
When top tier, you can play very confidently against tier 7 enemies, as very few of them will have enough standard penetration to reliably penetrate the upper plates of the tank. Most tier 7 heavy tanks will need premium ammo to penetrate the upper plates, and all mediums will struggle, even when using premium ammo (with a few exceptions).
When bottom tier against tier 9 tanks, or just facing tier 8 heavies, try to keep to using hulldown positions or sidescraping, as the hull front will be easily penetrable to enemy standard ammo.
Treat HESH as standard ammo:
On most tanks, the standard ammo is the ammo that has the most optimal damage to penetration ratio. It has good enough penetration to deal with many enemies, and has better damage than your higher penetration round.
On the Charlemagne, this ammo is HESH, it counts as a premium round, but you should treat it like its standard ammo. It has less penetration than AP (which you should treat as premium ammo), but much better penetration than HE.
The HESH ammo type is the best for both dealing damage and penetrating tanks. If you can’t penetrate an enemy, then change to AP. If the enemy has weak side or rear armour, then switch to HE.
Use all 3 shell types in battle:
The Charlemagne has a great selection of ammo, with all 3 having a purpose in battle.
HESH:
As stated above, this should be the ammo you use the most in battle. It has much higher damage then AP, and much higher penetration than HE.
AP:
This should be your “premium ammo”, its the highest penetration ammo you have, but it also deals the lowest amount of damage. Only use this if you can’t penetrate an enemy with HESH.
HE:
HE deals higher damage (530) than HESH (470), but only penetrates 75mm of armour (with calibrated shells. Its best against weak side and rear armour of tanks, or against light tanks and paper TDs. Since its got very high alpha (relative to the AP shell), it can also deal a good amount of splash damage to enemies, even when it doesn’t penetrate.
Go hulldown:
The Charlemagne has weak armour to most enemies it faces, so try to hide the hull whenever possible. The turret is small and very well armoured, so as long as the hull is hidden, you have quite a good change to bounce enemies.
Try to keep moving slightly while hulldown, as there are a few weakpoints on the turret. Moving slightly is more likely to throw off the enemies’ aim and get them to miss or bounce.
Going hulldown is the most reliable way to get bounces, and the best way to use the armour. Using gun depression in a hulldown position can allow you to expose the hull, as its very well angled and will be impenetrable to most enemies with gun depression factored in.
Don’t facehug:
Charlemagne’s hull armour is very angle-reliant, and facehugging reduces the angle significantly, as it allows enemies to look down on your upper plates. This would mean that nearly any enemy you face, even tier 7 tanks, could penetrate the upper plate without needing premium ammo.
Facehugging is just a very bad idea in this tank, as its hull is not that strong to begin with, and facehugging only reduces that armour further.
Don’t rush shots:
Though the Charlemagne seems to have great gun stats in terms of accuracy, its still best not to constantly take snap shots.
Since you use HESH often, you have to properly aim for the enemy weakpoints, since often you won’t be able to penetrate an enemy’s upper plate or turret unless they are very weakly armoured.
Even when using AP, you still have to make sure to aim the shot well, especially against tanks with very resilient hull and turret profiles (such as a Tiger II or a Chi-Se). Though in closer ranges, AP quite easily be used without too much aiming due to its consistent penetration. At longer ranges you’ll need to take a bit more time to aim with AP, just to make sure the shot connects and doesn’t miss. The accuracy stats are good, but not good enough to work without aiming properly.
Sidescrape:
The Charlemagne is a great sidescraper. Unlike Soviet HT hulls (like the IS-3), the Charlemagne’s hull is fairly narrow, so it’s pike nose doesn’t extend all the way over its tracks.
This makes it better for sidescraping, as the hull front won’t be as easily exposed when reversing out to shoot. The hull is also slightly angled inwards along the whole side, and is one uniform armour plate, so there are no hidden weaknesses or shot-catches. Be aware that the engine deck of the tank sticks up above the hull deck creating a small weakpoint when sidescraping.
When you do reverse out to shoot, try to not expose your tank for longer than needed, since enemies may push forward to put a shot into your upper plate. Shoot the shot then immediately pull forward into cover.
Tank gameplay:
Overall
Armour – 5/10
Gun – 8/10
Mobility – 5.5/10
Speed – 5/10
Charlemagne is overall a good tank.
Armour is strong only while hulldown or when top tier. HE protection is decent, sidescrape/hulldown capacity is good. Hull weak on flat ground.
Gun has great accuracy, gun handling, standard penetration, ammo choice, and great HESH & HE. DPM is low on standard ammo, aim time is decent, gun depression is good at -8.
Mobility is decent, with a strong engine, good acceleration, and good traverse on hard terrain. Traverse speed on medium terrain is fairly slow. Reverse speed is just below average.
Speed is average, 35km/h.
Is it worth getting?
Charlemagne is worth getting, but only for players who know how to utilize its ammo types and fairly unconventional armour. Its a very irregular heavy tank since its hull frontal armour isn’t great, and it uses HESH ammo (and HE quite often), which requires more game knowledge of armour weaknesses.
Its an enjoyable and unique tank, but it won’t suit everyone.
Charlemagne is worth 7,500 gold. Its a good tank with plenty of interesting and unique traits, and its the only heavy with premium HESH and a more regular gun (unlike the Caliban).
Camo cost:

“Inventor” camo: 3D, animated costs 2,000 gold
Firing animation of the camo.

Historical note:
The Charlemagne was a real tank, developed in 1985 by the School of Tank Technology in the UK.
The requirement was for a medium tank with a low profile, 120mm low velocity gun, and firepower and armour surpassing all tanks in British service at the time. However, it was also meant to be lighter and smaller than the tanks in service.
The tank had a few unique aspects to it.
-Reclined driver’s position, which was later used on the FV4202, and the FV4201 Chieftain.
-Unconventional armour layout, having a pike nose on its hull front.
-A ridged gun mount.
Inaccuracies with the in-game version:
-The armour on the upper front is 10mm too thin, the real tank was to have 120mm of frontal armour.
-The sides are also too thick, being 70mm, instead of the correct 50mm.
-The lower plate is also less armoured than the real version, being only 70mm thick, compared to the correct 168mm thick.
-The turret front is only 178mm, the real version had 235mm, however seeing as the armour is rounded, its likely that the real Charlemagne’s turret cheeks were about the same as the version in game. (Historically, rounded turrets have very thick frontal plates, but gradually get thinner towards the outer turret cheeks, this is not the case in-game, as its just a 178mm area on the entire turret front)
-The real Charlemagne was a 30 ton medium tank, in game its a 46 ton heavy tank. This is actually a reasonable adjustment, considering its heavy-like armour (even the real version of the tank’s armour counts as “heavy”), its highly unlikely that the tank could retain a weight of just 30 tons.
-Gun depression of -8 degrees is incorrect, the real tank had -10/+22 degrees.
-Engine power is 15hp too strong. The engine it mounts (the name) is correct, however the real Metoerite Mk.202 B had 585 BHP, not 600 BHP (not factoring the extra 17% horsepower you can gain from equipping the tank).
120mm “Low velocity” gun:
-Shell velocities and gun barrel length are too high/too long.
The whole concept of the gun was to be low velocity and recoil-less, so that it could save on weight and internal volume. Having high velocity is highly unrealistic, and the long-barrelled gun is not representative of low velocity guns, and would also require a massive gun breech, or a counterweight inside the turret. (You could technically argue this is the case with the Blitz Charlemagne, as it has less gun depression. However its still unlikely, as the loader also has a load assist mechanism, and the turret itself is just not very large.)
-The real gun did not recoil. This was due to a rigid mount, for the reason of saving of weight, size, and space inside the turret.
-Real muzzle velocity was around 607 m/s, much lower than the 750 and 850m/s that the shells in game have.
-Real ammo loadout would be HESH and HEAT. Any type of AP shell is completely unreasonable to have on a low velocity gun, as AP type shells rely on their flight speed to penetrate enemy armour.
HEAT, HESH, and HE don’t rely on a high flight speed to achieve penetration or detonate, hence why low velocity and recoil-less guns predominantly use these shells.
